Google Identity-Aware Proxy Provider
Backstage allows offloading the responsibility of authenticating users to the Google HTTPS Load Balancer & IAP, leveraging the authentication support on the latter.
This tutorial shows how to use authentication on an IAP sitting in front of Backstage.
It is assumed an IAP is already serving traffic in front of a Backstage instance configured to serve the frontend app from the backend.
Configuration
Let's start by adding the following auth configuration in your
app-config.yaml or app-config.production.yaml or similar:
auth:
  providers:
    gcpIap:
      audience: '/projects/<project number>/global/backendServices/<backend service id>'
      jwtHeader: x-custom-header # Optional: Only if you are using a custom header for the IAP JWT
      signIn:
        resolvers:
          # See https://backstage.io/docs/auth/google/gcp-iap-auth#resolvers for more resolvers
          - resolver: emailMatchingUserEntityAnnotation
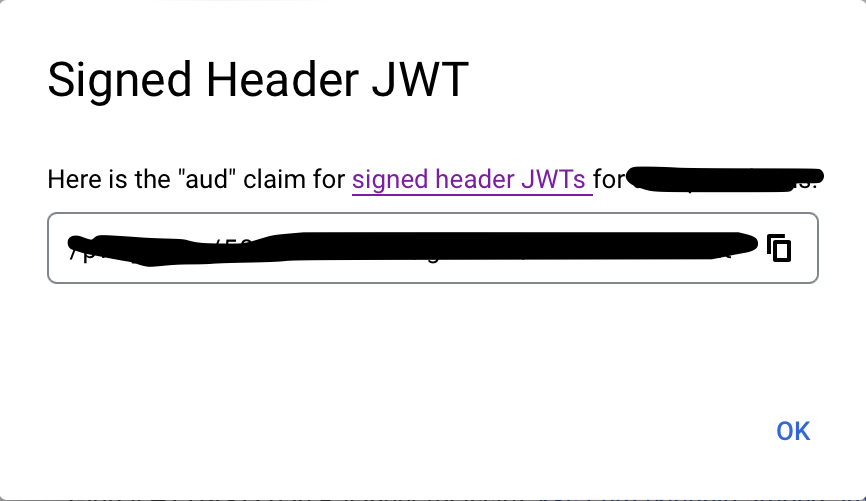
The full audience value can be obtained by visiting your Identity-Aware Proxy Google Cloud console, selecting your project, finding your Backend Service to proxy, clicking the 3 vertical dots then "Get JWT Audience Code", and copying from the resulting popup, which will look similar to the following:
This config section must be in place for the provider to load at all. Now let's add the provider itself.
Resolvers
This provider includes several resolvers out of the box that you can use:
emailMatchingUserEntityProfileEmail: Matches the email address from the auth provider with the User entity that has a matchingspec.profile.email. If no match is found it will throw aNotFoundError.emailLocalPartMatchingUserEntityName: Matches the local part of the email address from the auth provider with the User entity that has a matchingname. If no match is found it will throw aNotFoundError.emailMatchingUserEntityAnnotation: Matches the email address from the auth provider with the User entity where the value of thegoogle.com/emailannotation matches. If no match is found it will throw aNotFoundError.
The resolvers will be tried in order, but will only be skipped if they throw a NotFoundError.
If these resolvers do not fit your needs you can build a custom resolver, this is covered in the Building Custom Resolvers section of the Sign-in Identities and Resolvers documentation.
Backend Installation
To add the provider to the backend we will first need to install the package by running this command:
yarn --cwd packages/backend add @backstage/plugin-auth-backend-module-gcp-iap-provider
Then we will need to add this line:
backend.add(import('@backstage/plugin-auth-backend'));
backend.add(import('@backstage/plugin-auth-backend-module-gcp-iap-provider'));
Adding the provider to the Backstage frontend
See Sign-In with Proxy Providers for pointers on how to set up the sign-in page, and to also make it work smoothly for local development. You'll use gcpIap as the provider name.
If you provide a custom sign in resolver, you can skip the signIn block entirely.