Sign-in Identities and Resolvers
By default, every Backstage auth provider is configured only for the use-case of access delegation. This enables Backstage to request resources and actions from external systems on behalf of the user, for example re-triggering a build in CI.
If you want to use an auth provider to sign in users, you need to explicitly configure it have sign-in enabled and also tell it how the external identities should be mapped to user identities within Backstage. You do this by either choosing a built-in sign in resolver, or supplying your own. Both methods are listed below.
Quick Start
Backstage projects created with npx @backstage/create-app come configured with
a guest auth provider. This
provider makes all users share a single "guest" identity. This is useful for
testing purposes and quickly getting started locally, but is not safe for use in
production and that particular provider will refuse to work there.
Because of this, one of the early things you want to do when standing up your Backstage instance is to choose a production ready auth provider. See the auth overview page for a full list of providers and how to install and configure them.
Backstage User Identity
A user identity within Backstage is built up from two main pieces of information: a user entity reference, and a set of ownership references. When a user signs in, a Backstage token is generated which is then used to identify the user within the Backstage ecosystem.
The user entity reference should uniquely identify the logged in user in Backstage. It is encouraged that a matching user entity also exists within the Software Catalog, but it is not required. If the user entity exists in the catalog it can be used to store additional data about the user. There may even be some plugins that require this for them to be able to function.
The ownership references are also entity references, and it is likewise
encouraged that these entities exist within the catalog, but it is not a requirement.
The ownership references are used to determine what the user owns, as a set
of references that the user claims ownership though. For example, a user
Jane (user:default/jane) might have the ownership references user:default/jane,
group:default/team-a, and group:default/admins. Given these ownership claims,
any entity that is marked as owned by either of user:jane, team-a, or admins would
be considered owned by Jane.
The ownership claims often contain the user entity reference itself, but it is not
required. It is also worth noting that the ownership claims can also be used to
resolve other relations similar to ownership, such as a claim for a maintainer or
operator status.
The Backstage token that encapsulates the user identity is a JWT. The user
entity reference is stored in the sub claim of the payload, while the
ownership references are stored in a custom ent claim in the old backend
system but instead is made available through a user info API endpoint on the
auth backend in the new system. Both the user and ownership references should
always be full entity references, as opposed to shorthands like just jane or
user:jane.
Sign-in Resolvers
Be careful when configuring Sign-in resolvers, as they are part of determining who has access to your Backstage instance, and with what identity. Always only configure a single sign-in resolver for one of your auth providers. The only reason to have more sign-in resolvers is if you want to allow your users to sign in to Backstage in multiple ways, but it increases the risk of account hijacking.
Signing in a user into Backstage requires a mapping of the user identity from the third-party auth provider to a Backstage user identity. This mapping can vary quite a lot between different organizations and auth providers, and because of that there's no default way to resolve user identities. The auth provider that one wants to use for sign-in must instead be configured with a sign-in resolver, which is a function that is responsible for creating this user identity mapping.
The input to the sign-in resolver function is the result of a successful log in with the given auth provider, as well as a context object that contains various helpers for looking up users and issuing tokens. There are also a number of built-in sign-in resolvers that can be used, which are covered a bit further down.
Note that while it possible to configure multiple auth providers to be used for sign-in, you should take care when doing so. It is best to make sure that the different auth providers either do not have any user overlap, or that any users that are able to log in with multiple providers always end up with the same Backstage identity. For most organizations, it makes the most sense to provide only one sign-in method.
Using Builtin Resolvers
Most auth providers come with a set of builtin sign in providers that you can choose from. They target the most common use cases, and if they fit your needs, you can pick one or more of them without having to write any code at all. You still have to make a choice - as mentioned above, even if there are a set of builtins, none of them are selected by default.
You set up builtin sign in resolvers using your app-config, next to the respective provider's configuration. Here's an example for GitHub:
auth:
  environment: development
  providers:
    github:
      development:
        clientId: ${AUTH_GITHUB_CLIENT_ID}
        clientSecret: ${AUTH_GITHUB_CLIENT_SECRET}
        enterpriseInstanceUrl: ${AUTH_GITHUB_ENTERPRISE_INSTANCE_URL}
        signIn:
          resolvers:
            - resolver: usernameMatchingUserEntityName
The list of available resolvers is different for each provider, since they often depend on the information model returned from the upstream provider service. Consult the documentation of the respective provider to find the list.
In the example above, the usernameMatchingUserEntityName is specific to the
GitHub provider, but you could also choose to use the
emailMatchingUserEntityProfileEmail or emailLocalPartMatchingUserEntityName
resolvers, which are common to all auth providers.
When using the emailLocalPartMatchingUserEntityName resolver it is strongly
recommended to set the allowedDomains option to ensure that only authorized users
are able to sign-in.
If you are using the emailLocalPartMatchingUserEntityName resolver, it is
recommended to also set the allowedDomains option, for example:
auth:
  providers:
    github:
      development:
        ...
        signIn:
          resolvers:
            - resolver: emailLocalPartMatchingUserEntityName
              allowedDomains:
                - acme.org
Building Custom Resolvers
If the builtins don't work for you, you can also provide a completely custom sign-in resolver, through code. If you follow the installation instructions of one of the available providers, you will likely have added a dependency to your backend along with a line of code and some configuration.
Using GitHub as an example, this is the relevant parts of the backend code:
backend.add(import('@backstage/plugin-auth-backend'));
backend.add(import('@backstage/plugin-auth-backend-module-github-provider'));
When you want to supply a custom sign-in resolver, as a general pattern you remove that last import and instead construct your own provider using the facilities from the same package.
Make sure that your auth config in your app-config.yaml does not contain
any resolvers field - otherwise, they take priority.
auth:
  environment: development
  providers:
    github:
      development:
        clientId: ${AUTH_GITHUB_CLIENT_ID}
        clientSecret: ${AUTH_GITHUB_CLIENT_SECRET}
        enterpriseInstanceUrl: ${AUTH_GITHUB_ENTERPRISE_INSTANCE_URL}
        signIn:
          resolvers:
            - resolver: usernameMatchingUserEntityName
import { createBackendModule } from '@backstage/backend-plugin-api';
import { githubAuthenticator } from '@backstage/plugin-auth-backend-module-github-provider';
import {
  authProvidersExtensionPoint,
  createOAuthProviderFactory,
} from '@backstage/plugin-auth-node';

const customAuth = createBackendModule({
  // This ID must be exactly "auth" because that's the plugin it targets
  pluginId: 'auth',
  // This ID must be unique, but can be anything
  moduleId: 'custom-auth-provider',
  register(reg) {
    reg.registerInit({
      deps: { providers: authProvidersExtensionPoint },
      async init({ providers }) {
        providers.registerProvider({
          // This ID must match the actual provider config, e.g. addressing
          // auth.providers.github means that this must be "github".
          providerId: 'github',
          // Use createProxyAuthProviderFactory instead if it's one of the proxy
          // based providers rather than an OAuth based one
          factory: createOAuthProviderFactory({
            authenticator: githubAuthenticator,
            async signInResolver(info, ctx) {
              /*********************************************************************
               * Custom resolver code goes here, see farther down in this article! *
               * "info" is the sign in result from the upstream (github here), and *
               * "ctx" contains useful utilities for token issuance etc.           *
               *********************************************************************/
            },
          }),
        });
      },
    });
  },
});

backend.add(import('@backstage/plugin-auth-backend'));
backend.add(import('@backstage/plugin-auth-backend-module-github-provider'));
backend.add(customAuth);
Check out the naming patterns article for what rules
apply regarding how to form valid IDs. In this example we also put the module
declaration directly in packages/backend/src/index.ts but that's just for
simplicity. You can place it anywhere you like, including in other packages, and
import from there if you prefer.
The createOAuthProviderFactory / createProxyAuthProviderFactory functions
have additional options for profile and state transforms - not covered here, but
good to know about if you need them.
So what would the body of a typical sign in resolver callback look like? Here's an example:
// ...
async signInResolver(info, ctx) {
  const { profile: { email } } = info;

  // Profiles are not always guaranteed to have an email address.
  // You can also find more provider-specific information in `info.result`.
  // It typically contains a `fullProfile` object as well as ID and/or access
  // tokens that you can use for additional lookups.
  if (!email) {
    throw new Error('User profile contained no email');
  }

  // You can add your own custom validation logic here.
  // Logins can be prevented by throwing an error like the one above.
  myEmailValidator(email);

  // This example resolver simply uses the local part of the email as the name.
  const [name] = email.split('@');

  // This helper function handles sign-in by looking up a user in the catalog.
  // The lookup can be done either by reference, annotations, or custom filters.
  //
  // The helper also issues a token for the user, using the standard group
  // membership logic to determine the ownership references of the user.
  //
  // There are a number of other methods on the ctx, feel free to explore them!
  return ctx.signInWithCatalogUser({
    entityRef: { name },
  });
}
If you throw an error in the sign in resolver function, the sign in attempt is immediately rejected, and the error details are presented in the user interface.
The ctx context has several useful functions
for issuing tokens in various ways.
Custom Ownership Resolution
If you want to have more control over the membership resolution and token generation
that happens during sign-in you can replace ctx.signInWithCatalogUser with a set
of lower-level calls:
// File: packages/backend/src/plugins/auth.ts

// ...
async signInResolver({ profile: { email } }, ctx) {
  if (!email) {
    throw new Error('User profile contained no email');
  }

  // This step calls the catalog to look up a user entity. You could for example
  // replace it with a call to a different external system.
  const { entity } = await ctx.findCatalogUser({
    annotations: {
      'acme.org/email': email,
    },
  });

  // In this step we extract the ownership references from the user entity using
  // the standard logic. It uses a reference to the entity itself, as well as the
  // target of each `memberOf` relation where the target is of the kind `Group`.
  //
  // If you replace the catalog lookup with something that does not return
  // an entity you will need to replace this step as well.
  //
  // You might also replace it if you for example want to filter out certain groups.
  //
  // Note that `ctx.resolveOwnershipEntityRefs(...)` by default only includes groups
  // to which the user has a direct MEMBER_OF relationship.
  // It's perfectly fine to include groups that the user is transitively part of
  // in the claims array, but the catalog doesn't currently provide a direct
  // way of accessing this list of groups.
  const { ownershipEntityRefs } = await ctx.resolveOwnershipEntityRefs(entity);

  // The last step is to issue the token, where we might provide more options in the
  // future.
  return ctx.issueToken({
    claims: {
      sub: stringifyEntityRef(entity),
      ent: ownershipEntityRefs,
    },
  });
}
Sign-In without Users in the Catalog
Signing in users without verifying that they exist in the catalog can be dangerous. Take care to ensure that your custom resolvers only allow expected users to sign in, for example by checking email domains.
While populating the catalog with organizational data unlocks more powerful ways to browse your software ecosystem, it might not always be a viable or prioritized option. However, even if you do not have user entities populated in your catalog, you can still sign in users.
Custom Sign-in Resolver to bypass user in catalog requirement
As there are currently no built-in sign-in resolvers for this scenario you may want to implement your own.
Signing in a user that doesn't exist in the catalog is as simple as skipping the catalog lookup step from the above example. Rather than looking up the user, we instead immediately issue a token using whatever information is available. One caveat is that it can be tricky to determine the ownership references, although it can be achieved for example through a lookup to an external service. You typically want to at least use the user itself as a lone ownership reference.
Because we no longer use the catalog as an allow-list of users, it is often important that you limit what users are allowed to sign in. This could be a simple email domain check like in the example below, or you might for example look up the GitHub organizations that the user belongs to using the user access token in the provided result object.
import { stringifyEntityRef, DEFAULT_NAMESPACE } from '@backstage/catalog-model';

// ...
async signInResolver({ profile }, ctx) {
  if (!profile.email) {
    throw new Error(
      'Login failed, user profile does not contain an email',
    );
  }
  // Split the email into the local part and the domain.
  const [localPart, domain] = profile.email.split('@');

  // Next we verify the email domain. It is recommended to include this
  // kind of check if you don't look up the user in an external service.
  if (domain !== 'acme.org') {
    throw new Error(
      `Login failed, '${profile.email}' does not belong to the expected domain`,
    );
  }

  // By using `stringifyEntityRef` we ensure that the reference is formatted correctly
  const userEntity = stringifyEntityRef({
    kind: 'User',
    name: localPart,
    namespace: DEFAULT_NAMESPACE,
  });
  return ctx.issueToken({
    claims: {
      sub: userEntity,
      ent: [userEntity],
    },
  });
}
Using the dangerouslyAllowSignInWithoutUserInCatalog Option
Another way to bypass this requirement is to enable the dangerouslyAllowSignInWithoutUserInCatalog option for resolvers.
Users will still be authenticated as usual but this config will bypass the check that ensures the user is present in the catalog.
If the user entity is not found in the catalog, a Backstage user token will still be issued based on the identifying information available at the resolver level.
For example:
auth:
  providers:
    github:
      development:
        ...
        signIn:
          resolvers:
            - resolver: emailLocalPartMatchingUserEntityName
              dangerouslyAllowSignInWithoutUserInCatalog: true
Enabling this option in production poses security risks.
This option may grant access to unexpected users who haven’t been onboarded into Backstage. Since there is no user entity to associate with the signed-in user, permissions may not apply as expected and they will have the same permissions as a guest user. Careful consideration should be given to the permissions assigned to such users, particularly when using the permission system.
Profile Transforms
Similar to a custom sign-in resolver, you can also write a custom profile transform function which is used to verify and convert the auth response into the profile that will be presented to the user. This is where you can customize things like display name and profile picture.
This is also the place where you can do authorization and validation of the user and throw errors if the user should not be allowed access in Backstage.
const customAuth = createBackendModule({
  // This ID must be exactly "auth" because that's the plugin it targets
  pluginId: 'auth',
  // This ID must be unique, but can be anything
  moduleId: 'custom-auth-provider',
  register(reg) {
    reg.registerInit({
      deps: { providers: authProvidersExtensionPoint },
      async init({ providers }) {
        providers.registerProvider({
          // This ID must match the actual provider config, e.g. addressing
          // auth.providers.github means that this must be "github".
          providerId: 'github',
          // Use createProxyAuthProviderFactory instead if it's one of the proxy
          // based providers rather than an OAuth based one
          factory: createOAuthProviderFactory({
            authenticator: githubAuthenticator,
            async profileTransform(result, ctx) {
              /**********************************************************************
               * Custom transform code goes here!                                   *
               * "info" is the sign in result from the upstream (github here), and  *
               * "ctx" contains useful utilities.                                   *
               **********************************************************************/
              return {
                profile: {
                  email,
                  picture,
                  displayName,
                },
              };
            },
          }),
        });
      },
    });
  },
});
Remember to backend.add the created module just like above.
Common Sign-In Resolver Errors
There are two common Sign-In Resolver errors you might run into.
First is: "The 'Auth Provider Name' provider is not configured to support sign-in". Here is what this looks like for the GitHub Auth provider:
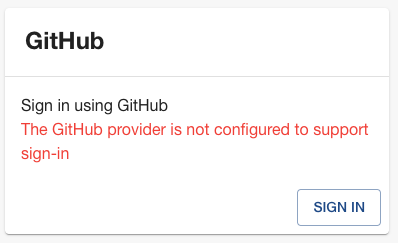
This error can be caused by the following:
- The
signIn.resolvershave not be added to your Auth Provider configuration. Adding this will resolve the error. - There is a syntax error in your Auth Provider configuration. Running
yarn backstage-cli config:check --strictwill help identify the syntax error.
The second common error is: "Failed to sign-in, unable to resolve user identity". Here is what this looks like for the GitHub Auth provider:
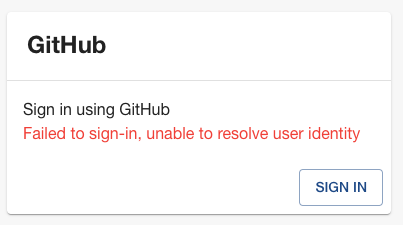
This error is caused by the Sign-In Resolver you configured being unable to find a matching User in the Catalog. To fix this you need to import User, and Group, data from some source of truth for this data at your Organization. To do this you can use one of the existing Org Data providers like the ones for Entra ID (Azure AD/MS Graph), GitHub, GitLab, etc. or if none of those fit your needs you can create a Custom Entity Provider.