GitHub Apps
Backstage can be configured to use GitHub Apps for backend authentication. This comes with advantages such as higher rate limits and that Backstage can act as an application instead of a user or bot account.
It also provides a much clearer and better authorization model as a opposed to the OAuth apps and their respective scopes.
Caveats
- This authentication method is built for authenticating towards organization repositories and not towards personal repositories.
- It's not possible to have multiple Backstage GitHub Apps installed in the same GitHub organization, to be handled by Backstage. We currently don't check through all the registered GitHub Apps to see which ones are installed for a particular repository. We only respect global Organization installs right now.
- App permissions is not managed by Backstage. They're created with some simple
default permissions which you are free to change as you need, but you will
need to update them in the GitHub web console, not in Backstage right now. The
permissions that are defaulted are
metadata:readandcontents:read. - The created GitHub App is private by default, this is most likely what you want for github.com but it's recommended to make your application public for GitHub Enterprise in order to share application across your GHE organizations.
A GitHub app created with the cli will have read access by default. You have to manually update the GitHub App settings in GitHub to grant the app more permissions if needed.
Using the CLI (public GitHub only)
You can use the backstage-cli to create a GitHub App using a manifest file
that we provide. This gives us a way to automate some of the work required to
create a GitHub app.
yarn backstage-cli create-github-app <github org>
You can read more about the
backstage-cli create-github-app command.
Once you've gone through the CLI command, it should produce a YAML file in the
root of the project which you can then use as an include in your
app-config.yaml. You can go ahead and
skip ahead if you've already got an app.
Note that the created app will have a webhook that is disabled by default and
points to smee.io, which is intended for local development. There's also
currently no part of Backstage that makes use of the webhook.
GitHub Enterprise
You have to create the GitHub Application manually using these instructions as GitHub Enterprise does not support creation of apps from manifests.
Once the application is created you have to generate a private key for the application and place it in a YAML file.
The YAML file must include the following information. Please note that the
indentation for the privateKey is required.
appId: app id
clientId: client id
clientSecret: client secret
webhookSecret: webhook secret
privateKey: |
  -----BEGIN RSA PRIVATE KEY-----
  ...Key content...
  -----END RSA PRIVATE KEY-----
Including in Integrations Config
Once the credentials are stored in a YAML file generated by create-github-app,
or manually by following the GitHub Enterprise
instructions, they can be included in the app-config.yaml under the
integrations section.
Please note that the credentials file is highly sensitive and should NOT be checked into any kind of version control. Instead use your preferred secure method of distributing secrets.
integrations:
  github:
    - host: github.com
      apps:
        - $include: example-backstage-app-credentials.yaml
Alternatively you can use environment variables as well:
integrations:
  github:
    - host: github.com
      apps:
        - appId: ${AUTH_ORG_APP_ID}
          clientId: ${AUTH_ORG_CLIENT_ID}
          clientSecret: ${AUTH_ORG_CLIENT_SECRET}
          privateKey: ${AUTH_ORG1_PRIVATE_KEY}
          webhookSecret: ${AUTH_ORG_WEBHOOK_SECRET}
Note that in both examples above apps is an array which means you can add multiple GitHub Apps using $include or environment variables as long as they are each for a different GitHub Org as mentioned under the Caveats section.
Limiting the GitHub App installations
If you want to limit the GitHub app installations visible to backstage you may
optionally include the allowedInstallationOwners option. If you configure
multiple apps, specifying this will bring some small performance benefits
as backstage can more easily select which app to use for a URL.
appId: app id
allowedInstallationOwners: ['GlobexCorp']
clientId: client id
clientSecret: client secret
webhookSecret: webhook secret
privateKey: |
  -----BEGIN RSA PRIVATE KEY-----
  ...Key content...
  -----END RSA PRIVATE KEY-----
This will result in backstage preventing the use of any installation that is not within the allow list.
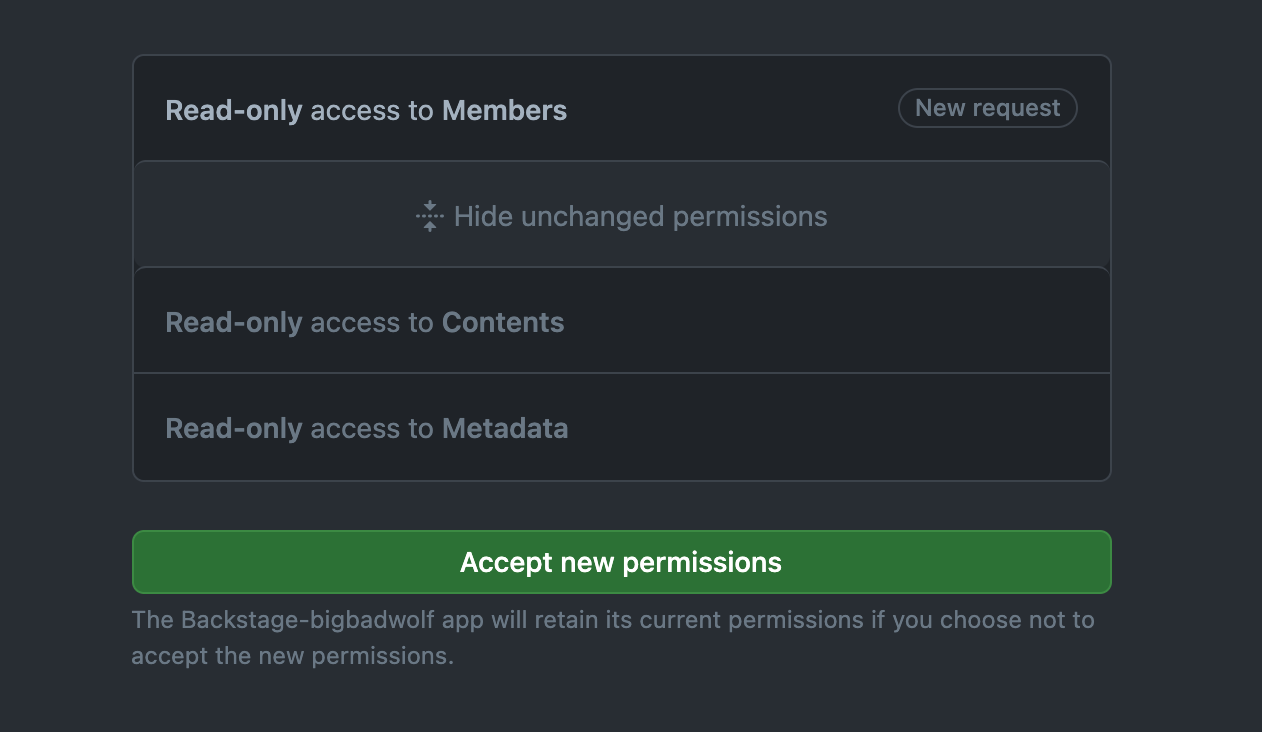
App permissions
When creating a GitHub App, you must select permissions to define the level of access for the app. The permissions required vary depending on your use of the integration:
-
Reading software components:
Contents:Read-onlyCommit statuses:Read-only
-
Reading organization data:
Members:Read-only
-
Publishing software templates:
Administration:Read & write(for creating repositories)Contents:Read & writeMetadata:Read-onlyPull requests:Read & writeIssues:Read & writeWorkflows:Read & write(if templates include GitHub workflows)Variables:Read & write(if templates include GitHub Action Repository Variables)Secrets:Read & write(if templates include GitHub Action Repository Secrets)Environments:Read & write(if templates include GitHub Environments)
Updating Permissions
There may be times where you need to update the permissions for your GitHub App, to easily get at the GitHub App you can find it at this URL:
https://github.com/organizations/{ORG}/settings/apps/{APP_NAME}/permissions
Please note that when you change permissions, the app owner will get an email that must be approved first before the changes are applied.
Troubleshooting
HttpError: This endpoint requires you to be authenticated.
This message tends to wrap a NotFoundError: No app installation found under the hood, which
is the result of not installing the app in your organization. Even if created via the backstage-cli
as a member and app manager of your organization, the app will not automatically install. You
must possess the Owner role in the organization to see the Install menu under your
app settings, then manually press Install to authorize the application.